Do you have a bland, boring room that needs a makeover? Want to freshen up a wall without radically redecorating? If so, consider creating an eye-catching statement wall with one of the following DIY tutorials:
Statement walls are a great for rejuvenating a room quickly with minimal cost. From washi tape to potato prints; DIY stamps to patterend paint rollers, we’ve got plenty of inspiration to get you started –
1) Polka Dot Potato Print
Can you believe it took a bag of potatoes and a few tubes of brightly coloured acrylic paint to create this fun statement wall ? When I saw this polka dot wall on Oh Happy Day, I just knew I had to share.
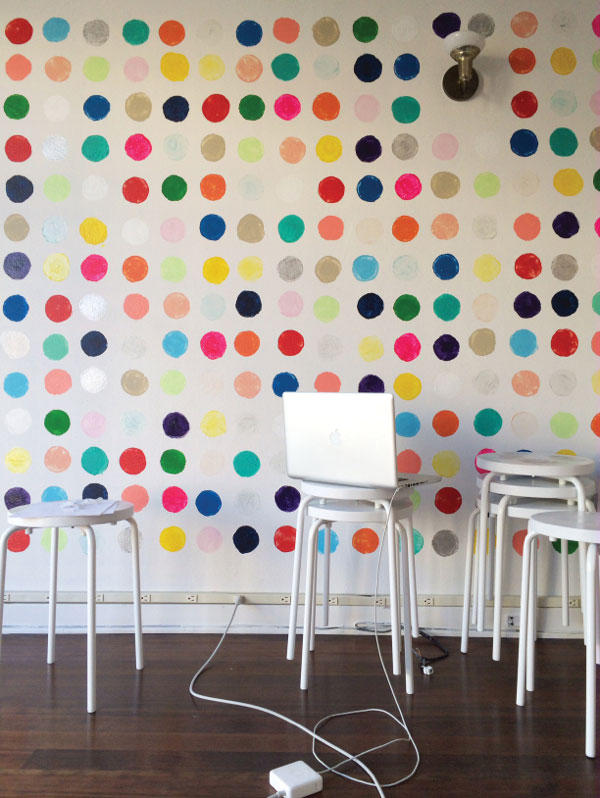
The potato is dipped into the coloured paint and stamped on the wall (on a pre-drawn grid). When I saw the finished wall, my mind drifted and I began to consider all the different colour combinations you could try! I think this DIY statement wall is fun and playful. It’d work brilliantly in a child’s room or home office (as above).
Best for: A tween or teen’s room. I think this is the perfect statement wall for an older child’s room—and what’s better? You could get them involved in the DIY Project. Have them choose the colours and assist with the painting itself.
Read this tutorial on Oh Happy Day
2) DIY Foam Stamp Print
I am a huge fan of anything nautical and I think this anchor print statement wall by A Beautiful Mess is fab. The sisters created this effect by making an anchor shape stamp from craft foam, dipping it in paint and printing it onto the wall. Simple but really effective.
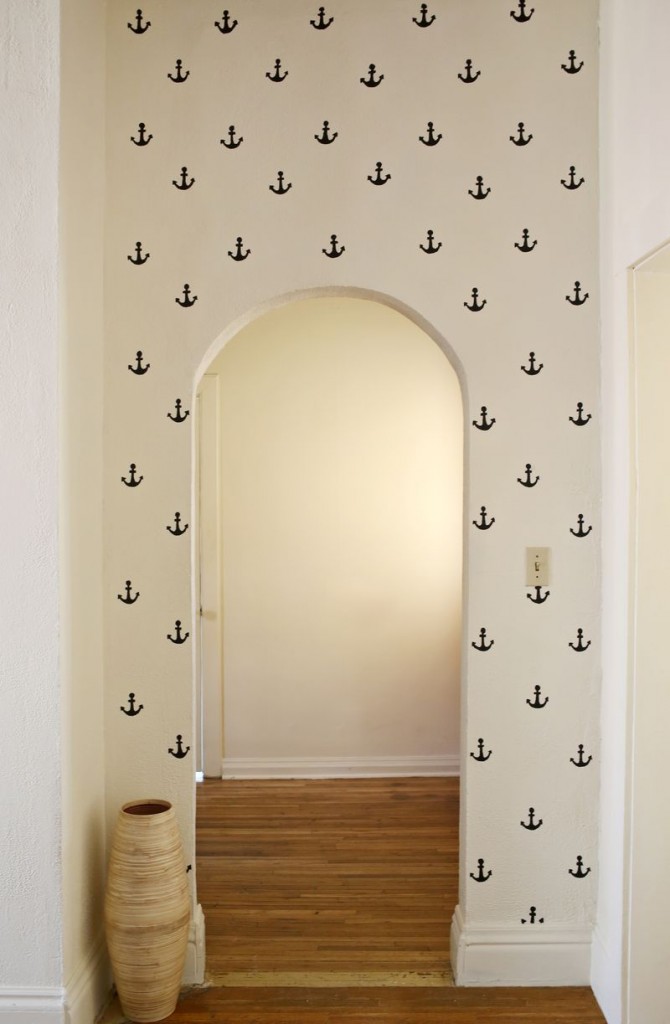
I love the idea of stamping and printing because it’s so flexible, and the design can be easily changed on a whim – simply give the walls a lick of paint, make a new stamp and hey presto.
Best for: Any room. I think nautical anchors would work wonderfully in a bathroom. Try roses for a livingroom, or let your teen choose their own motif.
See the anchor print statement wall tutorial on A Beautiful Mess
Resource: DIY Statement Wall Tutorials from A Beautiful Mess
A Beautiful Mess is a fantastic resource for DIY tutorials and craft projects for the home. They also try to make their tutorials as budget-friendly as possible too, which suits me! The two sisters are self-confessed statement wall lovers and they’ve devoted an entire section of their website to DIY project ideas. Choose from hand stamped shapes to washi-tape extravaganzas!
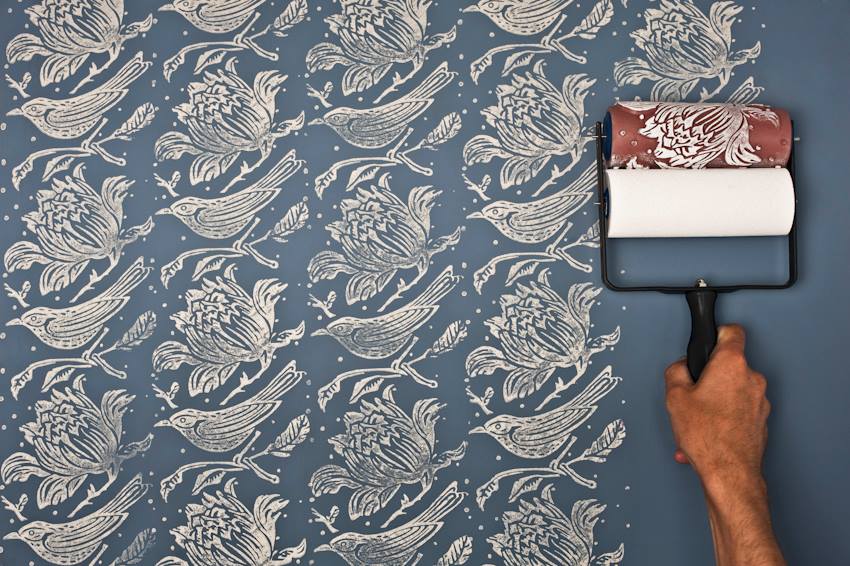
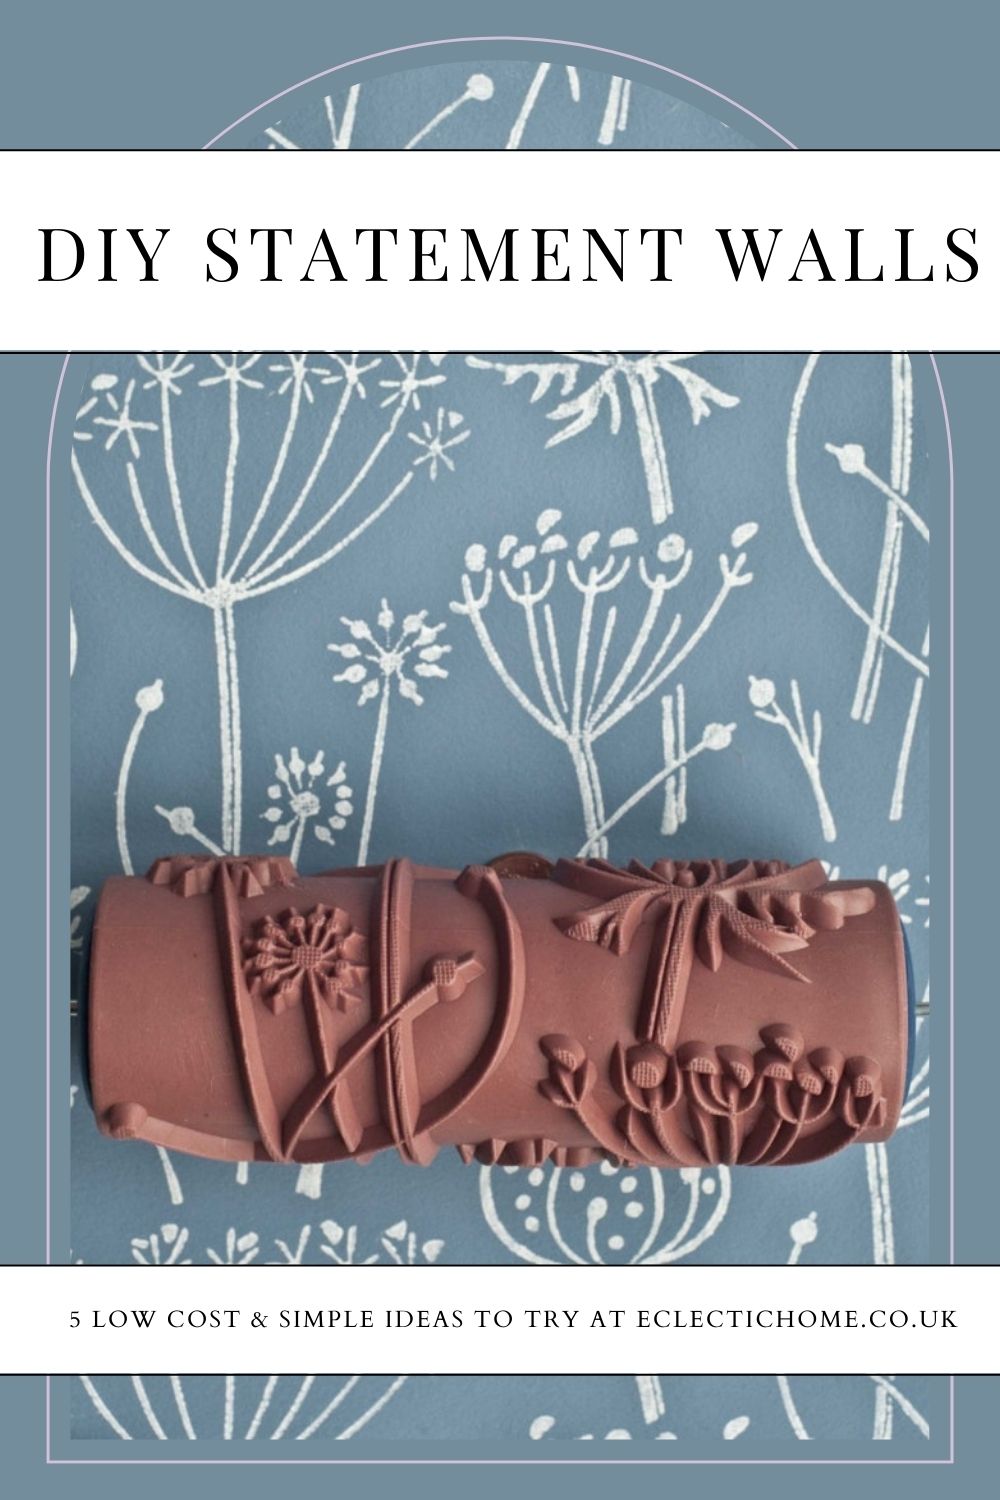
3) Patterned Paint Roller
Last year, a family member shared these patterned paint rollers by The Painted House on Facebook and I wanted one instantly! Sadly, I live in a rented house and am not supposed to decorate, otherwise I’d spruce up my walls with one of these fabulous designs.
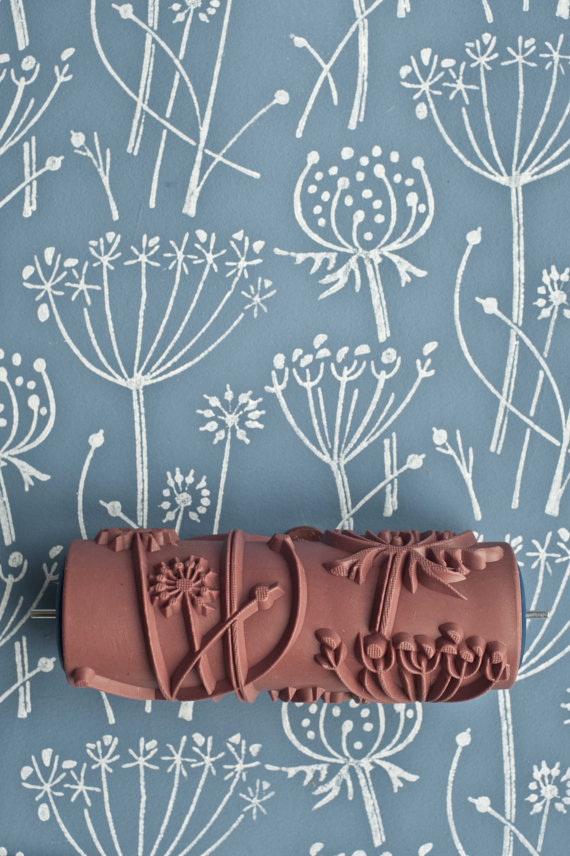
HOWEVER! Today, I learnt that you can paint more than just walls with these rollers! After visiting the company’s Facebook page, I found plenty of inspiration for painting fabrics, canvases, brown paper (for gift wrapping) and so on! A couple of these rollers are on my wish list for sure!
Shop The Painted House rollers on Etsy.
4) Contact Paper Dots
I am a complete Pinterest addict. Over the last couple of weeks, I’ve spotted some DIY statement wall tutorials using nothing more than metallic contact paper or draw liners. In each tutorial, the maker punched out circles from the paper and placed them on the wall at random, achieving a ‘confetti’ effect. Each tutorial I’ve read says this DIY is easy and inexpensive, which sounds perfect to me.
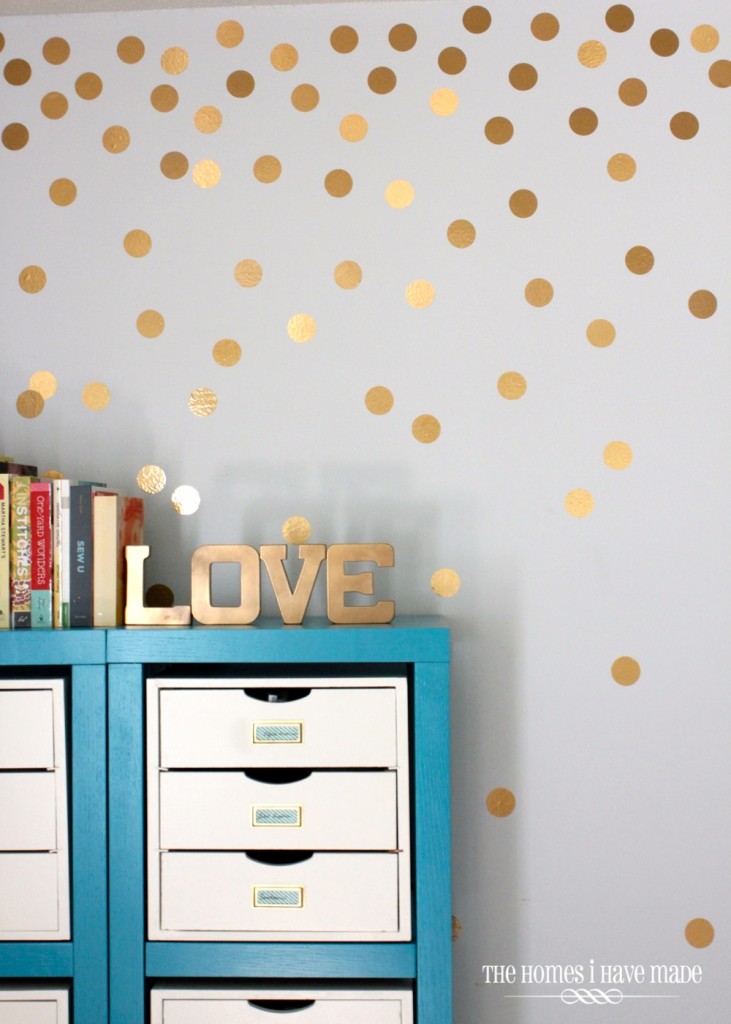
Above – inspiration from The Homes I have Made blog. The dots really add a stylish touch to the room.
Below – a photo from Lauren Conrad‘s blog. She decorated her new office space using gold contact paper dots too. She created super-sized circles using a special cutter (which I now want, naturally) and placed them all over the statement wall –
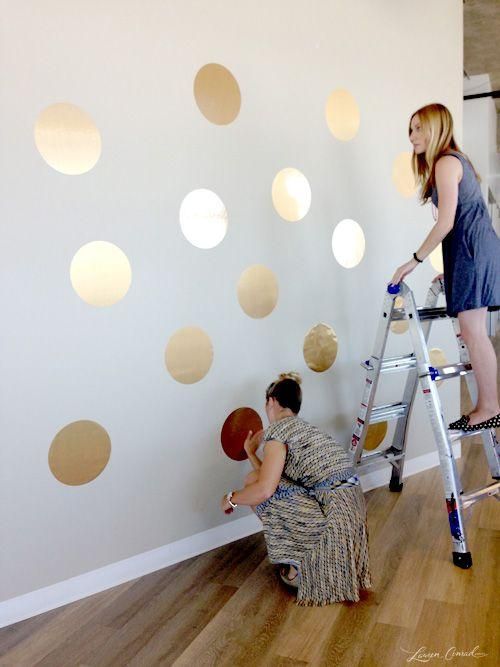
Simple, but effective. I’ve been looking at contact paper and I’ve seen some pretty fab designs.
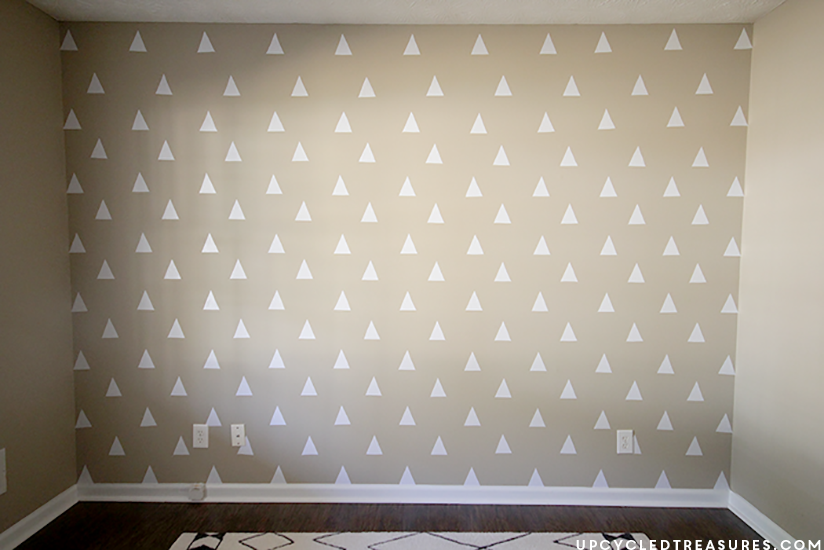
You don’t have to stop at circles either. UpcycledTreasures.com created a statement wall using triangle shapes cut out of white shelf liner (e.g. contact paper.) I really like the effect and it cost her under $3 (£2) to do. Bargain.
5) Washi Tape
Washi tape has become SO popular over the last couple of years. Nowadays you can find it everywhere in an array of colours and patterns. If you have several rolls of Washi Tape and a little time on your hands, hit up the Pinterest search box and you’ll soon have more DIY tutorials than you can shake a stick at. Here’s a couple of my favourites. First up, this vibrant rainbow masterpiece by Brit & Co. –
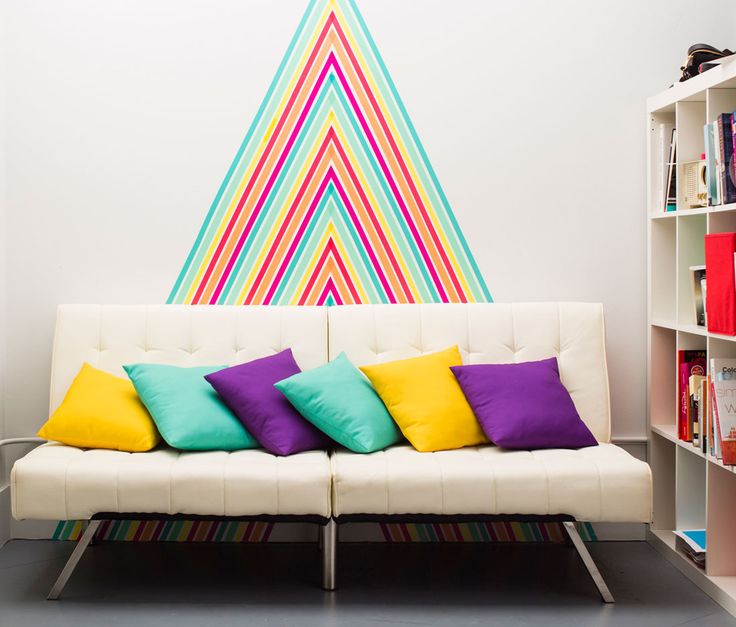
This bright, vibrant washi-tape design is just SO eye-catching and the colours make me feel cheery. It’s probably my favourite statement wall on the page.
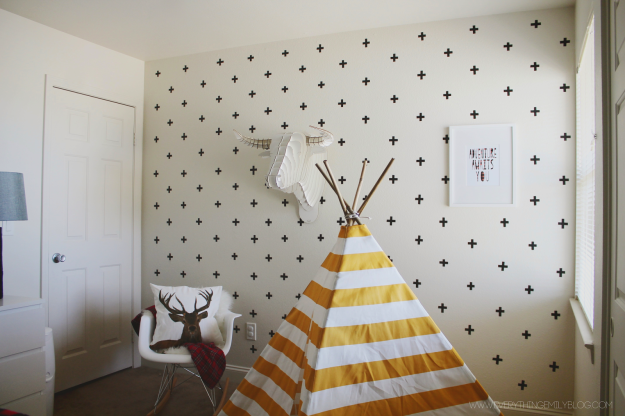
Here’s another one of my favourite DIY tutorials, and this one costs under $10 (£7) to do! I see this tutorial pop up on Pinterest pretty frequently, as I have a board dedicated to all things washi tape over on my personal account!
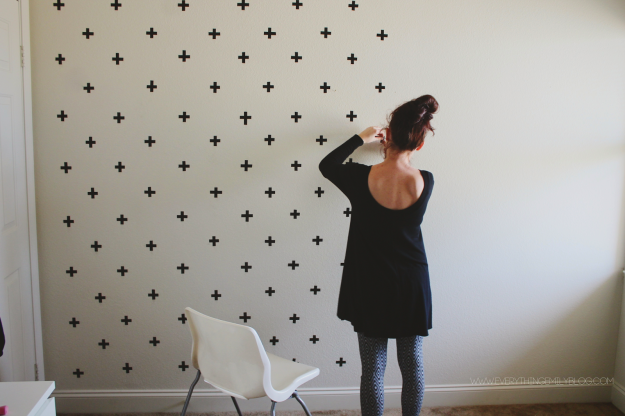
Grab two rolls of washi tape (or electrical tape) and cut them into 2” strips. Stick the strips on the walls at 5” apart. Emily used a credit card to smooth out the tape once applied to the walls and a hairdryer to heat the tape up, to make it extra durable and last longer (though another blogger confirmed she copied the idea and that it’d be six months since she tried out the wash tape decals, and it was still looking good!)
According to Emily, when she moved house the tape was easy to peel off.
Read the full tutorial, Emily’s tips and further instructions here.
Want EVEN MORE INSPIRATION?
From chalkboard to glitter to fabric! I have a Pinterest board chock-a-block FULL of DIY statement wall tutorials that I update regularly!
Pin these ideas to save for later:
Share your favourite DIY statement wall tutorials!
We love hearing YOUR feedback. Have you blogged a statement wall tutorial that we should know about? Or have you tried one of the above with success? Share in the comments below or tweet us @_EclecticHome.